Why?
Presently Creality release only a few pre-compiled firmware versions. If your Ender 3 V2 upgrade is supported by firmware provided by Creality then use theirs – it is easier.
If you update your printer to something not supported you will need to compile your own firmware or find one somebody has already done.
I wanted to install a BL Touch. This replaces the z-axis switch so I decided to re-purpose this switch as a quick stop button.
If you have already set up Visual Studio Code & Marlin and successfully compiled see Configuring Marlin for Ender 3 V2
How to compile
You’ll need software to compile the source code. For this use Visual Studio Code from Microsoft.
I found Visual Studio Code very difficult to use. It is not intuitive as it is crammed full of features and options. Luckily after the initial set up it is mostly just used as a text editor.
Downloading Marlin
Current version is 2.0.7.2 and available from GitHub
Marlin comes in two parts: The Marlin source code itself and another set of Config files.
The Marlin zip contains source code with tons of features to drive pretty much any printer
The Config zip contains specific configuration files for loads of different printers. These config files map processor pins to functions and enable/disable appropriate features that the printers controller board support. The default config for any given printer should enable support for a vanilla printer (one not modified yet).
Setting up Visual Studio Code for Marlin
Install Visual Studio Code (VSC). Simply download from Microsoft and accept all the default installation options.
Install PlatformIO Extension
PlatformIO is an extension inside VSC. Go to VIEW => EXTENSIONS in VSC

Prepare Marlin
Create a folder in a location of your choice named something like Marlin 2.0.7.2
Unzip the content of the Marlin source code to the above folder
Should look something like this:-
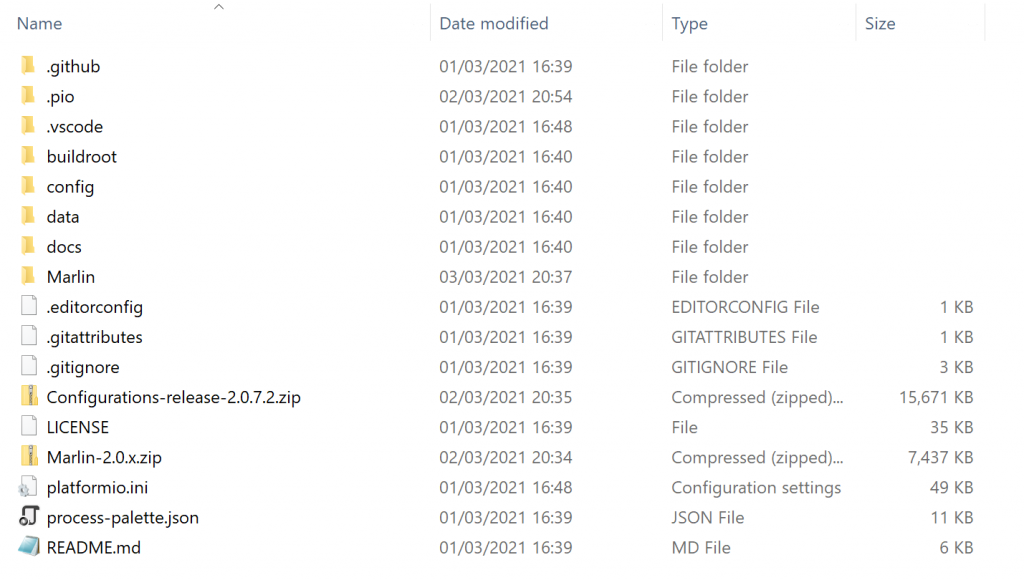
I dropped the two Marlin files in here to keep them all together
Add printer configuration
Now locate the base configuration for your printer. In the example above these are in the Configurations-release-2.0.7.2.zip (the second file you downloaded earlier)
Navigate into this zip, all the printer configs can be found in here. Follow the path config -> examples

Printers are ordered by Manufacturer/Type then Model
When your printer folder is located copy all the files in the folder and paste them into the Marlin folder found in your working folder (NOTE: This is the folder called Marlin inside your working folder – not the working folder itself). The paste operation should replace the default Configuration.h and Configuration_adv.h files among others.
Adding Marlin to CSV
With PlatformIO and your Marlin folder prepared you’re ready to create a workspace in VSC – Fancy talk for pointing VSC to the Marlin working files.
In VSC select FILE => OPEN FOLDER
Open the Marlin 2.0.7.2 folder you created earlier. Should see something like this:-

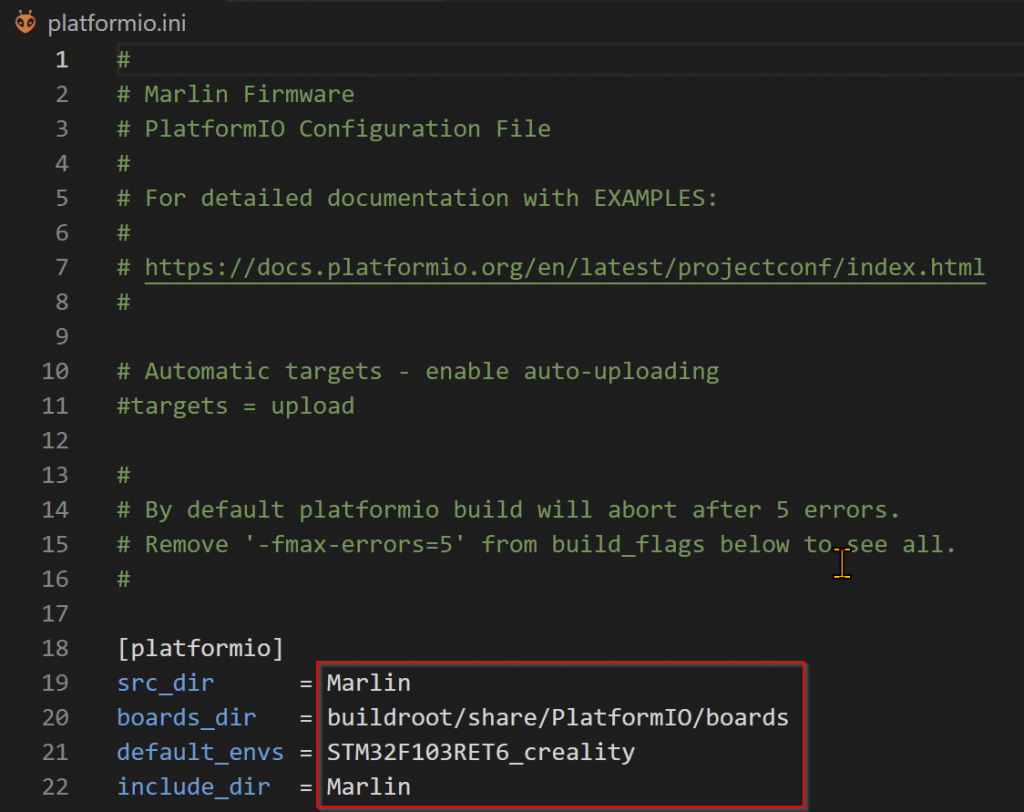
Edit platformio.ini
Shown highlighted above, this file needs to be edited so that PlatformIO knows what kind of processor your printer uses.
Settings shown are for the Ender 3 V2 with the 4.2.2 Controller Board
Compiling Marlin
VSC should be ready to compile. Give it a go by clicking the tiny tick at the bottom of the screen.

With luck the firmware will compile. If not check the errors and google a solution.
Where is the firmware?
VSC writes the firmware file to .pio / build / yourprocessortype /
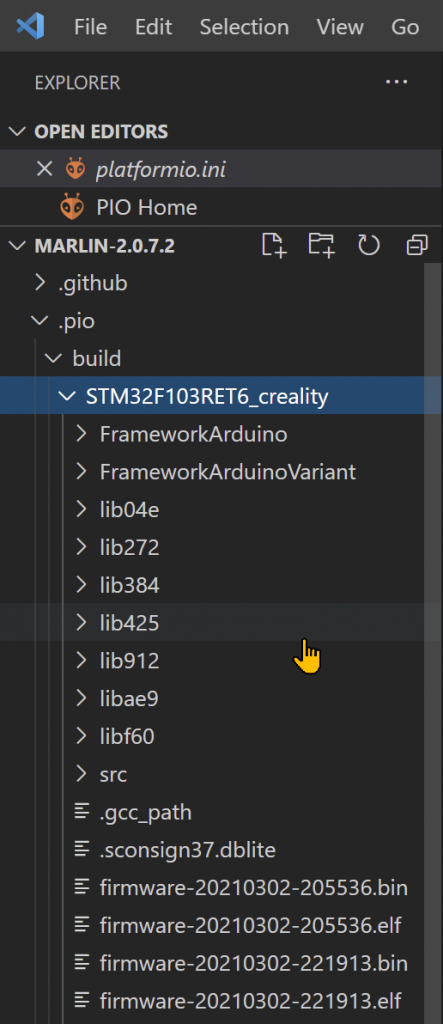
Each time you compile another firmware.bin is created
That’s the default firmware compiled for your printer. Editing the Configuration.h and Configuration_adv.h files custom firmware can be created.